I recently purchased an LG N2A2 2 Bay NAS to use as my primary disk to disk backup solution. As per LG’s recommendation – a big shiny sticker on the box – I upgraded the firmware to the latest version before using the NAS in anger. This new firmware (6674) has a far improved interface and capabilities than than provided with the firmware shipped with the NAS. The downside is that all of the online help documentation is in Korean.
As my knowledge of Korean is non-existent, working out how to configure the NAS’ disks to RAID1 required more than a little help from Google Translator. Detailed below is how I configured RAID1. As usual, this information is provided “AS IS” and you use it at entirely your own risk.
Caution: ensure you backup all data on the NAS prior to performing this task. This process will irretrievably wipe all existing data you may have stored on the NAS.
1. Log into the web management interface of the NAS using the admin username and password (by default this is ‘admin’ and ‘admin’).
2. On the homepage of the web interface, click on the Volume option. If it is not present, go to the Configuration section via the links on the left of the page to find it.
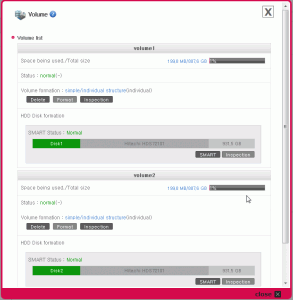
3. If your NAS volumes have never been altered from their as shipped state, the volumes list should contain two separate volume (see screenshot 1).
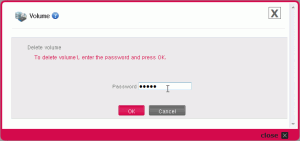
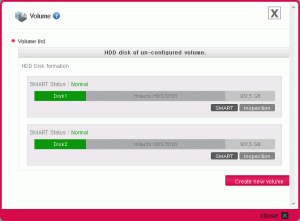
To configure RAID1, both of these volumes must be deleted. Click on the Delete button next to each volume to do this. You will be prompted to confirm the deletion (see screenshot 2). Enter the admin password and click on *OK* to confirm the volume deletion. Once deleted, a confirmation message will appear (see screenshot 3).
4. Once both volumes have been deleted, the volumes list just show the two unused disks (see screenshot 4). To start creating the RAID1 volume, click on the Create New Volume button.
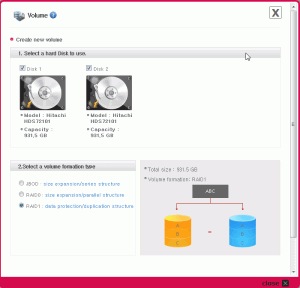
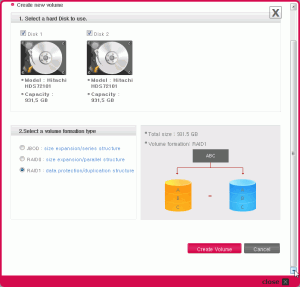
5. The next dialog will list the available unused disks. Click/select both Disk 1 and Disk 2. By default, the option RAID1: data protection/duplication structure should automatically be selected under 2. Select a volume formation type, if not, select it (see screenshot 5).
6. The create new volume dialog is actually larger than its’ containing window. To proceed, scroll down using the scroll bar on the right and click on the Create Volume button to start the RAID1 creation process (see screenshot 6).
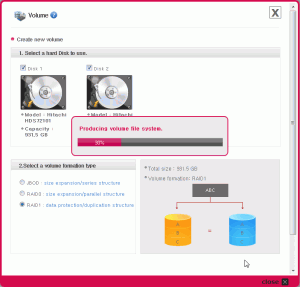
7. The creation process will now begin. A small dialog will appear showing the progess of the volume creation (see screenshot 7). Once completed, this dialog will update to display an OK button. Click on this button to continue.
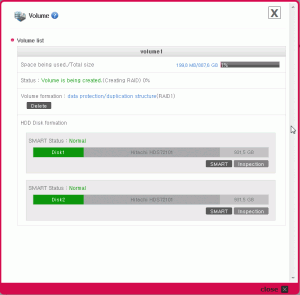
8. You will not be returned to the volume listings which will show a single volume comprising of two disks in RAID1 formation (see screenshot 8).
Important: The volume is not yet ready for use.
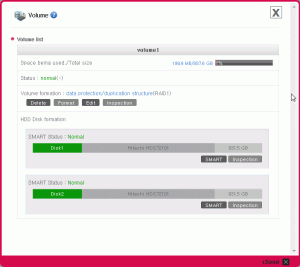
Please note the status message of Volume is being created. (Creating Raid) 0% in screenshot 8. The new volume is still being configured for RAID. Only start writing data once this status value changes to normal (see screenshot 9). This process may take several hours, and the status message does not dynamically update. You will need to close the Volume window and then re-open it to get an up-to-date status message.

